Water marble nail art is a mesmerizing technique that allows you to create beautiful swirls of colour on your nails. It’s a creative and fun way to achieve a unique manicure that stands out. Whether you’re new to nail art or a seasoned enthusiast, mastering water marble nails opens up a world of endless possibilities. Let’s dive into the art of water marble nail design and discover how you can achieve stunning patterns right at home
What is Water Marble Nail Art?
Water marble nail art involves creating intricate designs by swirling nail polish colours on the surface of water. The technique creates a marble-like effect that is both elegant and eye-catching. Each nail design is unique, as the patterns formed on the water’s surface cannot be replicated exactly.
Materials You’ll Need
Before starting, collect these essential materials:
- Nail Polish: Choose your favourite colours. Ensure they are of good quality and suitable for water marbling.
- Room Temperature Water: Use filtered or bottled water to prevent impurities that could affect the nail polish.
- Tape or Liquid Latex: To protect the skin around your nails from getting polish on it.
- Toothpicks or Orange Sticks: For creating designs in the polish on the water.
- Top Coat: To seal and protect your design once it’s dry.
Step-by-Step Guide to Water Marble Nail Art
- Prepare Your Nails: Start by preparing your nails. Trim and shape them as desired. Apply a base coat to shield your nails and enhance polish adhesion.
- Set Up Your Workspace: Cover your workspace with newspaper or paper towels to protect it from spills. Ensure all your materials are close by for convenient access.
- Prepare the Water: Fill a small bowl with room temperature water. Use filtered water if possible to avoid impurities that can affect the nail polish.
- Apply Nail Polish: Choose your nail polish colours and open the bottles. One by one, drop a small amount of polish onto the water’s surface. The polish will spread out and create a ring.
- Create a Design: Quickly use a toothpick or orange stick to create a design in the polish on the water’s surface. Drag the tool through the rings of polish to create swirls or patterns.
- Dip Your Nails: Once you’re satisfied with the design, align your nail over the part of the pattern you want to transfer. Slowly dip your nail into the water at a 45-degree angle. Hold it underwater while using a toothpick to gather excess polish from the surface.
- Remove Excess Polish: Once your nail is fully submerged, gently blow on the surface of the water to dry the polish. Use a toothpick or orange stick to gather any excess polish floating on the water’s surface.
- Remove Tape or Latex: Carefully lift your nail out of the water. Remove any tape or liquid latex that you applied to protect the skin around your nails.
- Clean Up: Use a cotton swab soaked in nail polish remover to tidy up any polish that may have accidentally touched your skin.
- Apply Top Coat: Once your nails are dry, apply a top coat to seal and protect your water marble design. This will add shine and help your manicure last longer.
Tips for Successful Water Marble Nail Art
Use Fresh Polish: Older polish may not spread properly on the water’s surface.
Work Quickly: Polish dries fast on water, so work swiftly to create your design.
Practice Patience: It may take a few tries to perfect your technique, so don’t get discouraged.
Experiment with Colour Combinations: Mix and match different colours to create unique designs.
Have Fun: Water marble nail art is all about creativity and experimentation, so enjoy the process!
Taking Care of Your Water Marble Nails
To prolong the life of your water marble nails, follow these care tips:
Avoid Harsh Chemicals: Use gloves when cleaning or doing chores to protect your manicure.
Moisturize: Keep your nails and cuticles hydrated with cuticle oil or moisturizer.
Touch-Ups: If your nails chip, use a small brush to touch up the design with matching polish.
Remove Gently: Use a non-acetone nail polish remover to gently remove your water marble nails without damaging your natural nails.
Grace and Glamour
Grace and Glamour Salon offers a sanctuary of beauty and relaxation in every visit. From expert haircuts and luxurious treatments to precise nail art and rejuvenating facials, our skilled professionals cater to your every beauty need. Step into a world of elegance and pampering at Grace and Glamour Salon, where our commitment to excellence ensures you leave feeling radiant and refreshed. Experience the difference today and discover your true glamour.
Conclusion
Water marble nail art is a fascinating technique that allows you to unleash your creativity and achieve stunning nail designs. With a bit of practice and the right tools, you can create swirls of colour that are as unique as you are. Whether you’re preparing for a special occasion or simply want to treat yourself to a beautiful manicure, water marble nails are sure to impress. So, gather your supplies, experiment with different colours, and have fun creating your own masterpiece on your nails!
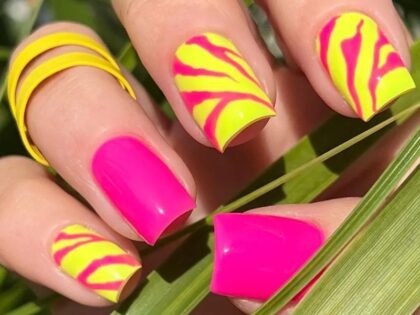
Related:- Trendy Neon Nail Art Bright and Bold Designs for Summer